Inspiring Others to Believe in Themselves ... Small Daily Improvements = Exceptional Results Over Time!!
▼
Wednesday, August 31, 2016
Black Bean Salad
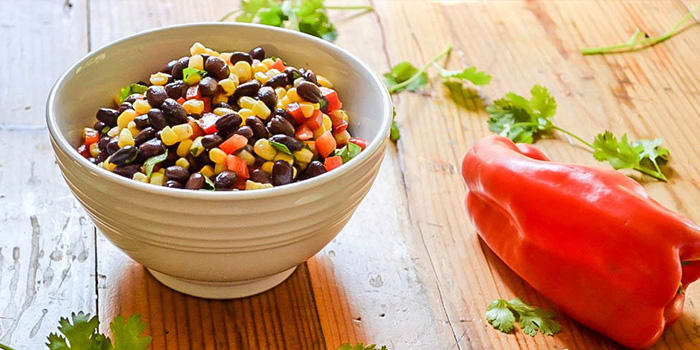
Corn, black beans, red bell pepper, and cilantro become best friends in this super-simple salad. Fresh lime juice ties everything together as a bright, citrus dressing that adds almost no calories. It can be eaten right away, but tastes even better after chilling for an hour or two.
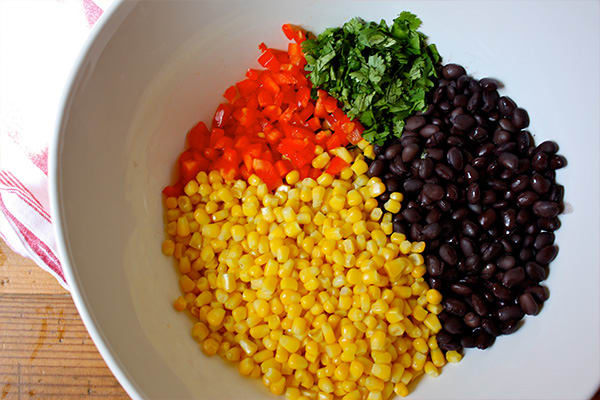
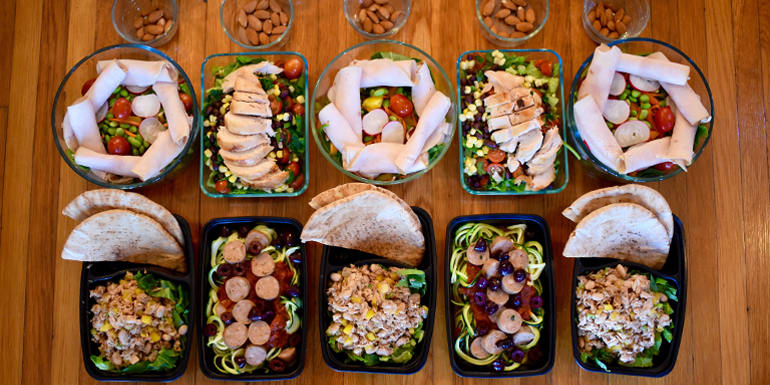
This colorful salad has only 5 ingredients and takes less than 5 minutes to prepare. It makes enough servings for a week of delicious side dishes or snacks, so it’s terrific for meal prep. Get other colorful meal prep ideas here.
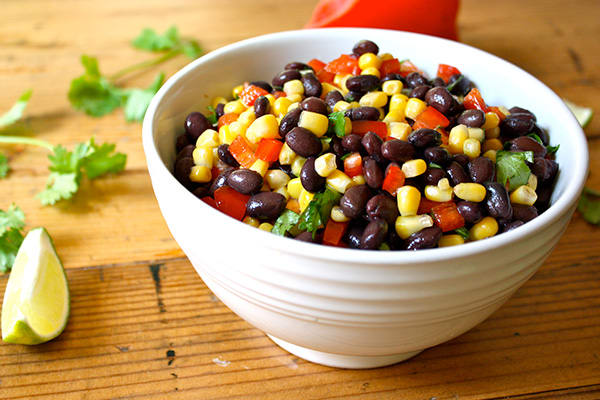
Black Bean Salad
Total Time: 2 hrs. 5 min.
Prep Time: 5 min.
Cooking Time: None
Yield: 8 servings, about ½ cup each
Ingredients:
2 cans (15-oz. each) black beans, rinsed, drained
1 (15-oz.) can corn, rinsed, drained
1 medium red pepper, chopped
¼ cup finely chopped fresh cilantro
¼ cup fresh lime juice
Preparation:
1. Combine beans, corn, bell pepper, and cilantro in a large bowl; mix well.
2. Drizzle bean mixture with lime juice; toss gently to blend.
3. Chill, covered, in refrigerator for 1 to 2 hours before serving.
By: Beachbody
Container Equivalents: 1/2 Green, 1 Yellow
Tuesday, August 30, 2016
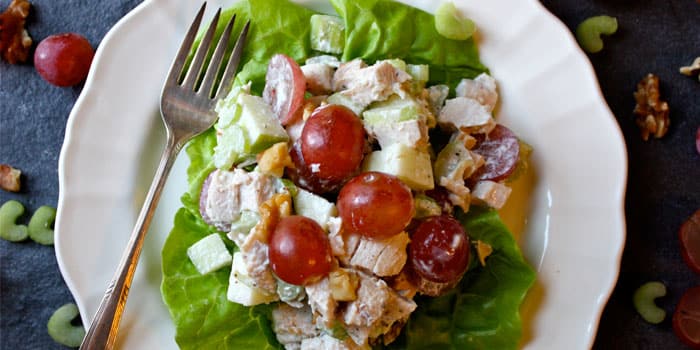
Turkey Waldorf Salad
The Waldorf salad has been a favorite American dish since the turn of the 20th Century, but the original mayonnaise-smothered recipe was in need of a makeover to fit into a healthier modern diet. We created this refreshingly lean version made with crunchy apples, celery, walnuts, sweet grapes, and turkey breast. Ours is lightened by blending yogurt with a touch of mayonnaise to make a creamy sauce that stays true to the flavor of the original. The result is a salad you’ll want to eat again and again.
This is a perfect way to use leftover turkey or chicken. Serve on lettuce, or use the whole lettuce leaves to make lettuce cups.
Turkey Waldorf Salad
Total Time: 20 min.
Prep Time: 20 min.
Cooking Time: None
Yield: 4 servings, about 1¼ cups each
Ingredients:
½ cup low-fat (1%) plain yogurt
4 tsp. olive oil mayonnaise
1 Tbsp. fresh lemon juice
1 tsp. raw honey
½ tsp. sea salt (or Himalayan salt)
½ tsp. ground black pepper
2½ cups shredded roasted turkey breast (approximately 12 oz.)
2 medium celery stalks, sliced
1 medium Granny Smith apple, chopped
¼ cup chopped raw walnuts
1 cup halved red grapes
8 Boston (or Bibb) lettuce leaves
Preparation:
1. Combine yogurt, mayonnaise, lemon juice, honey, salt, and pepper in a medium bowl; mix well. Set aside.
2. Combine turkey, celery, apple, walnuts, and grapes in a medium serving bowl; mix well.
3. Add yogurt mixture; toss gently to blend.
4. Serve on top of lettuce.
By: Beachbody
Container Equivalents: 1/2 Green, 1 Red, 1/2 Purple, 1/2 Blue, 1/2 tsp.
Eating Healthy Is Not More Expensive
“Healthy food is too expensive!” is a complaint that Autumn Calabrese, creator of the 21 Day Fix, hears all too often. But it’s simply not true. So, Autumn decided to prove once and for all that a healthy home-cooked dinner can cost the same as fast food from McDonald’s. Let’s call it a tale of two meals.
First, Autumn went to McDonald’s to buy dinner for herself and her son, whom she calls “Little Man.” She ordered a Quarter Pounder with Cheese, large french fries, and a large drink for herself. For Little Man she ordered chicken nuggets (6 piece), a small fries, and lowfat milk. The bill was $13.91. Here is the approximate nutritional breakdown of the meals using nutritional data from McDonald’s website.
Autumn:
• 1310 calories
• 50 g fat (15.5 g saturated fat)
• 185 carbs
• 35 g protein
• 830 mg sodium
• 80 g sugar
Little Man:
• 669 calories
• 31.5 g fat (6 g saturated fat)
• 60 g carbs
• 23 g protein
• 795 mg sodium
• 18 g sugar
Next, Autumn and Little Man went to Trader Joe’s with the goal to spend the same amount of money on ingredients to make a healthy dinner. She spent $15.01, about a dollar more, but she had enough for leftovers. Her $15 purchased one packet of 5 thinly-sliced chicken breasts, two potatoes, a cucumber, a bell pepper, and a tomato. With those simple ingredients, she made 34 chicken nuggets for her son (leaving 28 for leftovers) and made 2 chicken breasts for herself (giving her one for leftovers), baked homemade french fries with one of the potatoes, and chopped veggies for a large salad. Watch the video below to hear more about her cost comparison.
There are many healthy inexpensive options out there. Look for fruits and vegetables that are on sale, those tend to be what’s in season too. Check the bulk bins for dried beans and lentils, brown rice, rolled oats, and other whole grains. Get more tips for eating healthy on a budget here.
By: Beachbody
Monday, August 29, 2016
How to Think Yourself Fit
In an attempt to get fit, we tend to focus on the physical.
Exercise is good, so more is better. Right? Stick to a routine and you’ll have a six-pack in no time. How hard can it be? Well, it must be harder than it seems. Otherwise, we’d all be walking around looking like we were chiseled from marble. Since we don’t all look like Greek Gods or Goddesses, it’s safe to say that getting in shape can be a bit of a struggle. What’s getting in your way?
Often, the biggest obstacle standing between you and your fitness goals is your mindset. But your mind can also be dialed in to help you reach optimal performance. Train your brain to think yourself fit with these simple tips.
Picture Success
Seeing really is believing. Take a page out of a pro athlete’s playbook by picturing the outcome you hope to achieve. It doesn’t matter if you’re training to run a 5K or trying to lose a few pounds, painting a mental picture of your success will help carry you to the finish line.
The brain loves a good dress rehearsal. The more you rehearse, or practice, a move in your mind the easier it becomes in reality. Try to make your thoughts as vivid as possible. Imagine every step, and every breath, from start to finish. Doing so is a surefire way to prep for the pressure that comes with taking on a new challenge.
Go Big, Think Small
There’s nothing wrong with setting a lofty goal. For instance, take running a marathon. It’s a massive undertaking. One that might be overwhelming if you think about all 26.2 miles. But, if you break it down mile-by-mile it becomes more manageable. That’s how ultra-runner Hal Koerner, two-time winner of the Western States 100 manages to make it through races much further than your average marathon. Koerner suggests running to a specific landmark in the distance. Then, after reaching it, set your sights on a new challenge. Instead of focusing on the finish line, focus on making the next water station.
Like a marathon, overhauling what you eat might seem impossible. Dining out makes dieting especially difficult and even when you eat at home you may have to learn how to cook new meals, change your grocery shopping habits, and generally find a way to totally overhaul the way you eat. But, little changes can make a difference too.
For instance, opting for an apple at lunch each day, instead of a bag of chips is far more manageable than swapping out everything you eat all at once. Similarly, replacing a starchy carbohydrate like bread with a fresh vegetable like kale makes your dinner that much healthier.
In time, these small changes will come to represent substantial progress on your quest to eat healthier. According to a study conducted at Northwestern University, these types of small changes can result in a domino effect on other health-related habits. Researchers set out to alter four unhealthy behaviors: eating too much saturated fat, not eating enough fruits and vegetables, spending too much time being sedentary, and not getting adequate exercise. But, instead of trying to tackle four problems at once, researchers found that a small reduction in TV time, along with eating more fruits and vegetables lead to a healthier lifestyle overall. In all, small changes have a ripple effect that extends into other aspects of your life.
Master Your Mind
Meditation has long been a mainstay in many Eastern religions. Nowadays, scientists are studying the implications of mindfulness on our fast-paced lives. From exercise andemotions, to stress and self-esteem, meditation is proving to be a game changer for achieving our goals.
With respect to fitness and athletics, meditation helps prepare the mind and body to deal with unexpected stress. An intense training session in the gym could cause us to quit. Or at the very least leave us questioning why we’re subjecting ourselves to such taxing workouts. But, if you were to take up meditation, you might be less likely to second-guess yourself. At least that’s what a study of meditating Marines concluded. Evidence suggeststhat the meditating helps the brain react to high-stress situations and recover more quickly from those episodes. That’s because meditation is like biceps curls for your brain. Your mind will become better at anticipating stress, without overreacting to it. In this way, you’ll be able to push through the pain to finish a workout or make a split second decision on the playing field.
Take the first step towards mindfulness by sitting by yourself. Find a quiet room. Remove all of the potential distractions (yes, this includes your phone) and try to clear your mind by focusing on your natural breathing pattern. Repeat this practice for at least 5 minutes a few days each week. Over time, try to up the amount of time you meditate as well as the frequency of your practice. Along with the other brain-training techniques, meditation will help you master your mind to help break down the barriers between you and your goals.
By: Beachbody
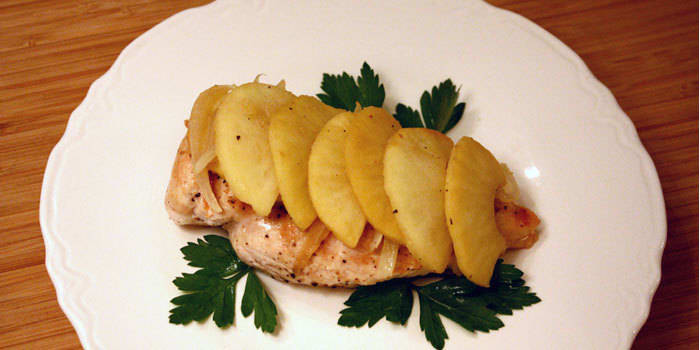
Grilled Chicken with Honeyed Apples
This grilled chicken dish topped with honey and sautéed apples is great no matter what you are celebrating or just looking for a healthy sweet-and-savory chicken recipe.
Total Time: 35 min.
Prep Time: 15 min.
Cooking Time: 20 min.
Yield: 4 servings
Ingredients:
¼ cup low-sodium chicken broth
1 Tbsp. Dijon mustard
2 tsp. raw honey
1 dash sea salt
4 tsp. olive oil, divided use
4 (4-oz.) raw chicken breasts, boneless, skinless
4 medium Granny Smith apples, peeled, cored, thinly sliced
½ medium onion, thinly sliced
Preparation:
1. Preheat grill or broiler.
2. Combine chicken broth, mustard, honey, and salt in a small bowl; whisk to blend. Set aside.
3. Brush chicken breasts evenly with 1 tsp. olive oil.
4. Grill or broil chicken for 5 minutes on each side or until chicken is no longer pink in the middle and juices run clear. Set aside.
5. While chicken is cooking, heat remaining 3 tsp. oil in medium nonstick skillet over medium heat.
6. Add apples, onion, and chicken broth mixture; cook, stirring frequently, for 8 to 10 minutes, or until apples are tender and liquid thickens slightly to sauce consistency.
7. Serve apples over chicken.
By: Beachbody
Container Equivalents: 1 Red, 1 Purple, 1/2 Yellow, 1 tsp.
Friday, August 26, 2016
What Should I Eat Before my Workout?
The answer depends on two factors: your overall diet and how intense your workout is. If you eat small, balanced meals every few hours while you’re awake, you don’t really need a pre-workout meal strategy. Your body should have ample fuel to get you through any workout around an hour or less (longer workouts have specific needs).
However, if you go longer than 3 hours without eating, you should determine your needs based on a few things. First, how hard is your workout? Easy aerobics and other work where your heart rate doesn’t exceed 140/150 bpm (easy yoga, slow jogging, cycling, hiking, etc.) don’t use a lot of fuel (blood sugar and its back-up, glycogen) and can be done effectively on a fairly empty tank. Good hydration (water only) should be all the fuel you need.
Harder workouts, like INSANITY, P90X, or really anything in the Beachbody line that is hard for you, all have an anaerobic interval component which burns your limited stores of glycogen. Your body stores glycogen until you need it, but when your diet is very lean, like most Beachbody diet plans are, you will almost certainly deplete these stores before the end of your workout if you haven’t eaten in a while. This condition, called “bonking,” causes your performance to instantaneously plummet.
Here are some general rules to avoid the dreaded “bonk.” We’re not suggesting you eat 3 separate meals in the hours leading up to exercise. Rather, pick the one that best suits your day.
3 hours prior to a workout: Eat a well-rounded, light meal. As long as it’s not too many calories (more than 500-ish), most of it will be turned into fuel by the time you begin. Almost any meal in any Beachbody diet plan fits this mold, as you have ample time to digest.
2 hours prior: Eat a light snack that’s mainly carbohydrates. Something that’s 4 parts carbs to 1 part protein with little fat will ensure there’s time to convert it into glycogen. “Energy foods,” something like granola with yogurt and fruit, is ideal.
1 hour prior: Eat very light, no more than 200 or so calories at around a 4:1 carb to protein ratio. Low-fat, plain yogurt with a little fresh fruit thrown in is ideal. Any extra protein and fat will hinder your workout. It’s similar to the 2 hours prior snack, but since your body can only convert 200 to 300 calories into energy in a given hour you’ll want to keep the portions smaller.
Less than 1 hour: Try not to eat during the last hour before your workout. If you haven’t eaten in hours, liquid fuels, like juice, or easily digestible carbs, like half of a banana, will digest fast enough to help you during the later stages of the workout when your glycogen would otherwise run out. This is also a good time for targeting caffeine intake for ergogenic benefit. Better still, Beachbody Performance Energize includes low-dose caffeine with beta-alanine and quercetin. It also contains 15-30 carb calories, depending on your dosage.
By: Beachbody
Chicken Gumbo
This Cajun-style Chicken Gumbo uses lean chicken breast meat in place of high-fat sausage, and is thickened with arrowroot instead of butter and flour. Aromatic spices combine in a luxuriously rich sauce with okra and other vegetables. If fresh okra is not available in your local market, frozen okra will work just as well.
Total Time: 1 hr.
Prep Time: 15 min.
Cooking Time: 45 min.
Yield: 8 servings
Ingredients:
1 Tbsp. olive oil
1 medium onion, chopped
2 medium carrots, coarsely chopped
1 medium celery stalk, chopped
1 medium green bell pepper, chopped
4 cloves garlic, finely chopped
1½ lbs. raw chicken breast, boneless, skinless, cut into 1-inch strips
2 Tbsp. arrowroot (or corn starch)
3 cups low-sodium organic chicken broth
1 bay leaf
½ tsp. dried thyme
½ tsp. ground black pepper
2 tsp. hot pepper sauce (like Tabasco®)
8 oz. medium okra, sliced into ½-inch pieces (about 1 cup)
2 cups cooked brown rice
Preparation:
1. Heat oil in large saucepan over medium-high heat.
2. Add onion, carrots, celery, and bell pepper; cook, stirring frequently, for 5 to 6 minutes, or until onion softens.
3. Add garlic and chicken; cook, stirring frequently, for 4 to 5 minutes. Set aside.
4. Add arrowroot to broth; whisk to blend.
5. Slowly whisk broth into chicken mixture; cook, stirring constantly, for 2 minutes, or until mixture thickens slightly. The mixture should not be lumpy.
6. Add bay leaf, thyme, pepper, and hot sauce. Bring to a boil, stirring frequently. Reduce heat to medium; cook for 10 to 15 minutes.
7. Add okra; cook, stirring frequently, for 10 to 15 additional minutes. Remove bay leaf.
8. Serve about ¾ cup over ½ cup of rice.
By: Beachbody
Container Equivalents: 1 Green, 1 Red, 1 Yellow, 1/2 tsp.
Thursday, August 25, 2016
How to Build Ankle Strength for Sports and Preventing Injuries
Many of us who exercise regularly, perform tough workouts, or play sports tend to worry about knee pain before we ever consider our ankle joints — that is, until we’ve sprained them, fractured an ankle, or experienced issues with our Achilles tendons.
Building ankle strength and stability is crucial for avoiding injury and allowing you to do your workout or play a sport to the best of your ability.
Your ankle joint is made of three bones: the tibia (shinbone), fibula (smaller bone of the lower leg), and talus (a small bone that sits between the heel bone) as well as two joints and multiple ligaments.
The most common cause of ankle injuries involve twisting or rotating your ankle, rolling your ankle, tripping or falling, or a big impact (such as a car accident) damaging the ankle in some way.
To prevent the bulk of these injuries, to avoid repeat injuries, and to help yourself build strong ankles, work a couple of these exercises into your weekly training schedule. Just add a couple of moves every workout. Studies show you should also be strengthening your glutes which will help your body control deceleration and decrease the impact on your ankle joints during exercises like plyometrics.
One of the best things you can do for your ankles is spend more time warming up before a workout. “Warm-up properly and stretch thoroughly afterwards. Start with an easy jog, a quick spin on a stationary bike or elliptical or, a brief set of jumping rope,” says Jonathan M. Roth, M.D., an orthopedic surgeon who specializes in sport medicine at Fort Belvoir Community Hospital in Alexandria, VA.
Moves to Help Build Ankle Strength
1. Balance calf raises
Stand on the edge of a step on your toes, rise up onto your toes with both feet and lift one leg behind you, knee bent in back, and then slowly lower yourself down with the other foot until your heel goes below your toes. Rise up and 3–4 sets of 10 reps per leg.
2. Ankle eversion with resistance band
Ankle eversion exercises strengthen the peroneal muscles that run down the outside of the lower legs, and are useful for those who “roll” their ankles or sprain their ankles frequently. Sit (or stand if you want more of a challenge) and tie a loop in the resistance band, placing your right foot in the loop. Wrap the resistance band around the other foot to stabilize or hold the end in your hands. Point the foot down-and-up 20 times, then perform ankle rolls in both directions for 20 reps per.
3. Yoga Warrior 3
Stand with arms at your sides and raise one straight leg off the floor (behind you) bringing your torso parallel with the floor (hold onto a counter or table for balance if needed). With your right leg extended in back, slowly bend left leg four inches or so, then push back up to full leg extension. Alternate 3–4 sets of 10 repetitions per leg . You can also challenge yourself (and your ankles) by placing small objects, like tennis balls or socks around the room and with each semi-squat, lean over unassisted to pick up one item. This balance exercise is excellent for working on ankle stability and calf strength.
4. Plyometrics and sports
“Jumping rope is a great way to teach soft landings,” says Roth. You can also increase thecadence as you get comfortable building speed. For lateral training — or side-to-side ankle stability — both tennis and basketball are sports that work your ankles and lower leg muscles.
In fact, in Beachbody’s own The Master’s Hammer and Chisel program, the trainers offer several effective ankle exercises to help prevent injury and strengthen the ankles and feet:
rotating squat jumps
multidirectional lunges
skater triangles
side shuffles
lateral squat hop
Stretch Your Lower Legs After Each Workout
Roth suggests stretching your feet and ankles thoroughly after each workout to further stabilize and support your lower leg. Here are two effective, common ankle stretches:
Step Calf Stretch
Calf stretching is important to maintain flexibility while strengthening and prevent injury to the lower legs and ankles. Stand on a step with the middle of your feet on the edge of the step (hold onto a table or railing if you need more balance). Lower your heels down to feel the stretch in your calves. Hold for several seconds, and then return to neutral, even rising up onto the balls of the feet, and return to start. Repeat for 30–60 seconds.
Yoga Downward Dog
A very efficient calf and shin stabilizer, perform a downward dog pose with your hips in the air and both heels reaching toward the ground. (Your body should form an upside down “V.”) You can alternate bending one knee and then the other to deepen the stretch and aim for 30–60 seconds per leg.
Preventing these kinds of sports injuries will ensure the longevity of your muscles and joints. It’s not too late to start, either.
By: Beachbody
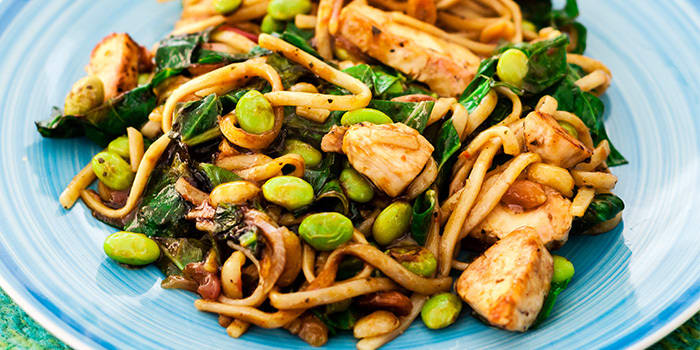
Peanut Chicken with Soba Noodles
We used buckwheat soba noodles instead of pasta in this Asian-inspired chicken dish. It’s loaded with leafy greens, fresh edamame and crunchy peanuts. Enjoy hot or cold!
Total Time: 32 min.
Prep Time: 20 min.
Cooking Time: 12 min.
Yield: 4 servings
Ingredients:
½ cup low-sodium organic chicken broth
1 Tbsp. all-natural peanut butter
1 Tbsp. reduced-sodium soy sauce
1 Tbsp. raw honey
2 cloves garlic, finely chopped
1 thin slice fresh ginger, peeled, finely chopped
1 tsp. coconut oil
12 oz. raw chicken breast, boneless, skinless, cut into 2-inch pieces
½ medium onion, thinly sliced
2 cups fresh spinach (or chopped baby bok choy)
1 cup fresh shelled edamame
2 cups cooked soba noodles (about 4 oz. dry noodles)
1 tsp. crushed red pepper (optional)
2 Tbsp. raw peanuts
Related: Nutrients 101: What’s Essential for a Healthy Diet
Preparation:
1. Combine broth, peanut butter, soy sauce, honey, garlic, and ginger in a medium bowl; whisk to blend. Set aside.
2. Heat oil in large skillet (or wok) over medium-high heat.
3. Add chicken and onion; cook, stirring frequently, for 4 to 6 minutes, or until onion is translucent.
4. Add spinach; cook, stirring frequently, for 2 to 3 minutes, or until spinach is wilted.
5. Add edamame, noodles, broth mixture, red pepper (if desired), and peanuts; cook, stirring frequently, for 2 to 3 minutes, or until heated through.
By: Beachbody
Container Equivalents: 1 Green, 1 Yellow, 1 Blue/Orange, 1/2 Red
Tuesday, August 23, 2016
Twisted Abs
Here we go...want an exercise that really sculpts your abs? This is it! This works your entire core...rectus abdominis, obliques, and transversus abdominis.
Lean back forming a "c" curve in your back, keep your chest up, and pull your abdominals in. As you twist, reach the weight back, tapping it side to side, you will lift your leg, keeping it straight while pointing your toes. Look in the direction you are twisting to get a full twist in your obliques.
My next accountability group begins soon. Be my next success story!
√ Meal Planning
√ Recipes
√ Daily Accountability
√ 30 Minute Workouts
√ Only 21 Day Commitment
√ Results
√ Fit back into clothes
√ New Wardrobe awaits
√ Increased Energy
√ Improved Confidence
Fill out the Challenger Application, and let's get your results started!! :)
Spinach & Chicken Enchiladas w/Easy Healthy Enchilada Sauce
Chicken enchiladas are a family favorite. I adapted my normal recipe to make it healthy. My family all loved it! This is a much requested recipe by my kids and hubby. I hope you enjoy it also!
Ingredients:
Whole Wheat Tortillas
3 lbs. Boneless, Skinless Chicken
2 cups Fresh Spinach
1 Tbsp. Coconut spread
1/2 tsp. Garlic Powder
1/2 tsp. Minced Onion
1/2 tsp. Chili Powder
1/4 tsp. Pepper
1/8 tsp. Sea Salt
1 cup Cottage Cheese
1/2 cup Plain Greek Yogurt
2 cups Mozzarella Cheese
Preparation:
- Pre-heat oven to 350.
- Melt coconut spread over medium heat. Stir in dry ingredients for 2 min.
- Stir in chicken and spinach & heat through 5 min. Remove from heat.
- Mix in cottage cheese, 1 cup mozzarella cheese, and greek yogurt until combined.
- Spoon mixture onto tortillas & roll.
- Place seam side down in 10x13 pan.
- Pour enchilada sauce over enchiladas.
- Sprinkle with remaining mozzarella cheese.
- Bake at 350 for 20 min. or until cheese is melted and bubbling.
Easy Enchilada Sauce
Ingredients:
1/4 cup Olive Oil
2 Tbsp. Whole Wheat Flour
1/4 cup Chili Powder
1/4 tsp. Garlic Powder
1/4 tsp. Cumin
1/4 tsp. Sea Salt
1 1/2 cup Water
8 oz. Low Sugar Tomato Sauce
Preparation:
- Heat oil & add flour (stirring with a wooden spoon). Cook 1 min.
- Add chili powder and cook 30 seconds.
- Add water, tomato sauce, garlic powder, cumin, and sea salt.
- Stir to combine.
- Bring to a boil, reduce heat to low, and cook for 15 min. to set flavors. Sauce will thicken and smooth out.
Container Equivalents: 1 Red, 1/2 Green, 1 Yellow, 1 Blue, 2 tsp.
Monday, August 22, 2016
Healthy Chicken Potpie
Potpie is a family favorite for us. My daughter is used to my high sodium unhealthy recipe. I switched it up, and made a healthy version. It was delish! I hope you enjoy it as much as we did.
Ingredients:
1 lb. boneless, skinless chicken breasts
1 can mixed vegetables drained
2 cups low-sodium chicken broth
1/4 tsp. pepper
3/4 tsp. garlic powder
3/4 tsp. minced onion
3/4 tsp. thyme or basil
3/4 cup whole wheat flour
1 1/2 cups unsweetened almond milk
2 whole wheat pie crusts
Preparation:
- Pre-heat oven to 350.
- Cook chicken and cut into cubes.
- Place chicken, chicken broth, drained mixed vegetables, and seasonings in pan & bring to a boil.
- Add milk
- Slowly sprinkle flour into the pan, stirring constantly. It will thicken as you do this.
- Spray non-stick olive oil spray in pan. Press one pie crust into an 8x8 pan.
- Pour mixture into pan.
- Top with second pie crust, cut slits in top of crust.
- Bake at 350 for 30 min. or until golden brown.
Container Equivalents: 1 Yellow, 1/2 green, 1/2 red
Friday, August 19, 2016
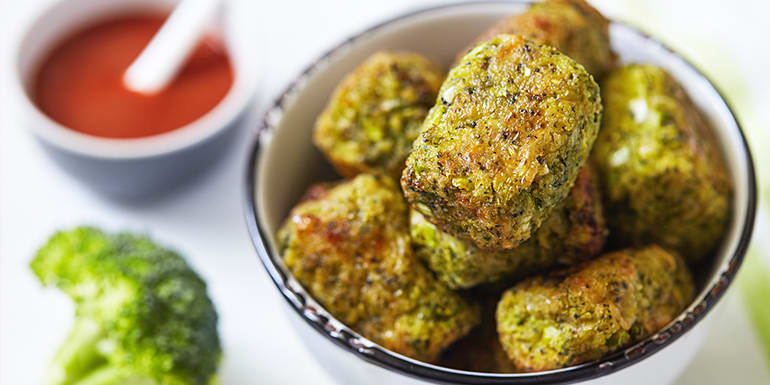
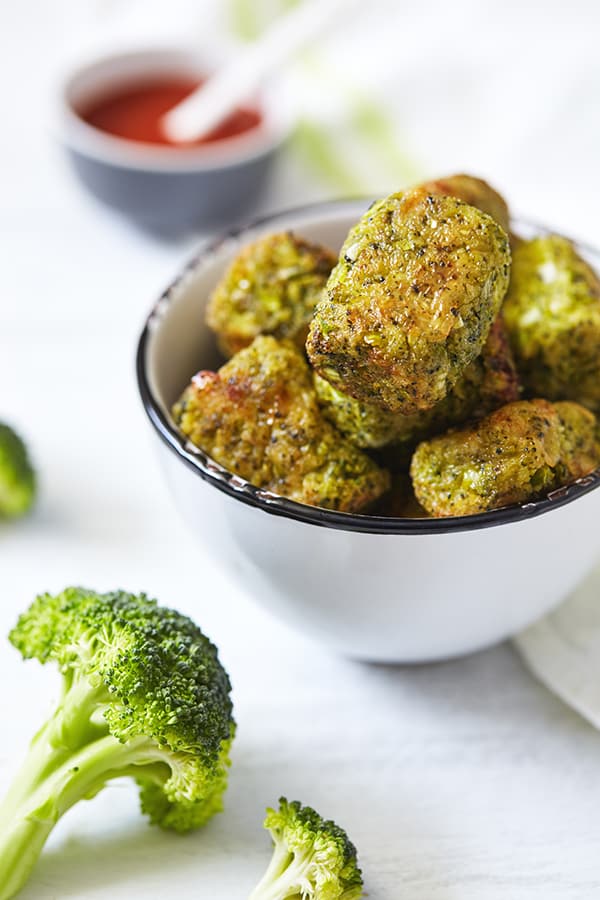
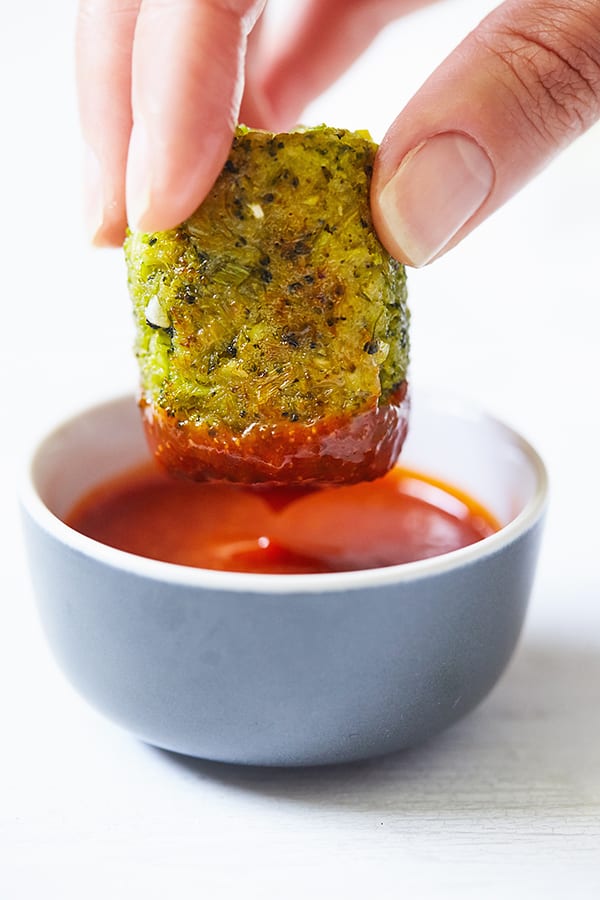
Broccoli Tots
Growing up, tots were one of my absolute favorite snacks. I loved the way the potatoes would crisp up in the oven. I’d eat them like candy — they were so good. Little did I know how much frying had been done to them before they even hit the store! Yikes. Since then, it’s safe to say that tater tots and I aren’t the close friends we used to be, now that I know how much oil and salt are lurking beneath their shiny exteriors.
That’s not to say I’ve forgotten about tots. In fact, the opposite is true. Recently I’ve been filling my tot void with these delicious Broccoli Tots. Oh yes, tots are back. And this time they’re chock full of broccoli. Getting your greens in has never been so fun!
To make these Broccoli Tots, you’ll start by steaming broccoli florets over the stove. Once tender, the broccoli gets chopped into small pieces — and then combined with egg, breadcrumbs, seasonings, and cheese. You can even add a bit of hot sauce for some extra heat. It helps to refrigerate the mixture briefly (15–30 minutes) to help it firm up and make the shaping process easier. To form your tots, use your hands to shape the mixture into a tot-like form. Then, place them on a baking sheet and bake until golden brown. The oven is a great way to avoid all the unnecessary oil from the deep fryer.
Everyone will get excited about these Broccoli Tots. They make a great snack, side dish, or even a fun appetizer to serve to guests. It’s a fun, bite-sized treat for kids and adults alike. So go ahead and give them a try — you know you want to!
Broccoli Tots
Author: Beachbody
Recipe type: Lunch/Dinner
Serves: 15 servings, 1 tot each
Ingredients:
Nonstick cooking spray
Hot water
12 oz. broccoli florets (about 5 cups)
1 large egg, lightly beaten
⅔ cup whole grain Panko bread crumbs
2 cloves garlic, finely chopped
¼ cup finely chopped green onions
⅔ cup shredded cheddar cheese
¼ tsp. sea salt (or Himalayan salt)
¼ tsp. ground black pepper
2 tsp. hot pepper sauce (optional)
Instructions:
- Lightly coat a large baking sheet with spray. Set aside.
- Boil water in steamer or large saucepan over high heat. Reduce heat to medium-high. Place broccoli in steamer basket; cook for 3 to 4 minutes, or until tender-crisp and bright green. Drain and chop.
- Preheat oven to 400º F.
- Combine broccoli, egg, bread crumbs, garlic, green onions, cheese, salt, pepper, and hot sauce (if desired) in a large bowl; mix well.
- Refrigerate, covered, for 15 to 30 minutes.
- To make each tot, shape approximately 2 to 3 Tbsp. broccoli mixture into tot shape. Place on prepared baking sheet.
- Bake for 8 to 10 minutes. Turn over; bake for an additional 7 to 8 minutes, or until golden brown.
Container Equivalents: 1 Green
Thursday, August 18, 2016
7 Moves for a Flatter Stomach
Spring is finally here! The birds are chirping, the sun is shining, and clothing appears to be getting . . . smaller. While the warmer weather and the reemergence of the sun make for happier brains, they make it harder for you to hide that muffin top underneath sweaters and jackets.
Unfortunately, your stomach is often one of the first places you gain weight and one of the last places you’ll lose it. Belly fat is not only bad for the beach; it’s downright dangerous. A study published in the American Journal of Hypertension revealed that “A larger waist measurement predicts the development of high blood pressure, regardless of total body fat.” Other studies have found that visceral stomach fat (versus the subcutaneous fat that you can pinch) is linked to higher total cholesterol, insulin resistance, colorectal cancer, and diabetes. It’s time to get serious about losing the spare tire around your waist—not only for aesthetic reasons, but also for your long-term health. And with just a few more weeks until beach season is here, there’s no better time to start shredding that fat so that you can reveal a flat, defined, sexy stomach.
A healthy diet—full of fresh fruits, vegetables, lean protein, and healthy fats (like avocado and olive oil)—is critical to getting a flat stomach. Ever heard the phrase “your abs are made in the kitchen”? It’s true. This, coupled with the Harvard Women’s Health Watch recommendation of at least 30 minutes of moderately intense physical activity a day, is the key to getting a flat tummy.
If seeing a flat stomach comes down to reducing your body fat through healthy diet and exercise, then why bother doing ab-specific exercises? One good reason is that “ab exercises” also strengthen your core, and a strong core can improve your posture and make you less prone to injury. Another is that the abs—like your biceps—are muscles. They’re comprised of 6 different muscles: the transverse abdominal that wraps around your torso, the internal and external obliques (one of each on each side), and the rectus abdominis (see the diagram). The rectus abdominis is the “six-pack” muscle. But strengthening all of them is important. Doing exercises that target these will strengthen them so they appear defined when your body fat percentage is low enough for them to be visible. With that in mind, here are 7 of my favorite ab-sculpting moves.
Training Camps from TurboFire
Chalene Johnson leads this fan favorite. Start in a seated position on the floor with your heels on the ground and toes facing 45 degrees toward the sky. Lean back until you feel your abdominals engage. Twist toward your right side, lean back, and touch your right elbow to the ground. Engage your abdominals, sit up, and repeat the move on the other side. This is an oblique killer and will help you create those little “fingerlike” muscles on your sides.
Sprints
Remember when you used to sprint around the playground as a kid? Those short, explosive bursts of energy do wonders for your midsection. Think back to the Summer Olympics when the sprinters were waiting on the starting line for the 100-meter dash. Every single one had a six-pack. Sprinting is an anaerobic activity that targets almost every muscle in your body, and especially the abdominals. When you have to quickly drive your knees up while staying in an upright position, you’re forced to use your core. Just make sure that you’re well warmed-up before going full bore.
Fifer Scissors from P90X
This move from Tony Horton hurts so good. Lie flat on your back with one straight leg extended so that it is perpendicular to the floor. The other straight leg should hover just off the ground. Switch legs every 10 seconds and don’t let either leg touch the ground. Note: If you find that your back is coming up off the ground or if it starts to hurt, place your hands underneath your lower back.
Stability Ball Roll-Outs
This is a real core burner! Start with your knees on the ground and a stability ball in front of you on the floor. Place your hands and wrists on the top of the stability ball and slowly roll the ball out in front of you. Keep your arms straight while rolling out the ball and keep your back straight. If your back starts to sway or if your butt drops, you’ve gone too far. Slowly roll back in.
Tuck Jumps from INSANITY
And you probably thought jumping was only for your legs! This tummy tamer gets your heart rate up, works your entire body, and tones abs all in one. Start with your feet shoulder-width apart. Drive your arms up into the sky and lift your knees to your elbows. Like with sprinting, you’ll want to be fully warmed-up before trying this exercise.
Stability Ball Knee to Chest
Place your hands on the ground and the tops of your feet on the stability ball so that you are in a push-up/plank position. With your core engaged (good luck trying this without it engaged!), bring your knees to your chest and then move them back out to a plank position. Do not let your back sway or your butt drop.
Hip-Ups from Body Beast
Spot-burning fat through exercise is impossible. But this exercise will help strengthen the lower half of your rectus abdominis muscle. Lie flat on your back with your feet flexed toward the sky and your hands at your sides. Engage your stomach, lift your hips up, and drive your feet straight up. Lower your hips back down to the ground in a slow, controlled motion.
For extra support in achieving that toned stomach, follow these 5 gut-busting tips:
1. Ditch the Refined Sugar
It may look good and taste good, but refined carbohydrates and sugars wreak havoc on your midsection. It’s OK to have a treat once in a while, but try to keep these waistline killers to a minimum.
2. Stand Up Straight
The more you slouch, the more your stomach pooches. According to WebMD, you should “align your ears over your shoulders, shoulders over hips, hips over knees, and knees over ankles. Keep the fronts of the shoulders open like a shirt on a hanger. Draw your navel to your spine and keep your weight even on the balls and heels.” This posture will help you look much leaner and, over time, this isometric contraction of your abs will help strengthen them.
3. HIIT Training
Engage in High Intensity Interval Training (also known as HIIT) and you can see more results in less time! This type of exercise, done in short bursts with brief recovery periods between sets, can help spike your metabolism so you burn calories for hours after you’re done working out.
4. Sleep
Getting the right amount of shut-eye can help you get the flat tummy of your dreams. When you skimp on shut-eye, your body undergoes physiological stress, which causes your body to store fat. Strive to get 8 or more hours every single night. Scientific American reports that “even short-term, partial sleep deprivation could pave the way for weight gain and other negative metabolic consequences.”
5. Reduce Stress
Stress can be good or bad depending on how we deal with it. We need stress to change and progress, but too much of it can cause our bodies to enter a “fight-or-flight” biochemical process. According to WebMD, this makes “our bodies store fuel, slow down metabolism, and dump out chemicals [such as the stress hormone cortisol] which are more likely to cause . . . obesity in the abdominal region.” When we’re stressed, we also tend to reach for comfort foods. If you lower your stress levels (through time management, yoga, meditation), you won’t need to self-medicate with food and your hormone levels will be much healthier.
By: Beachbody
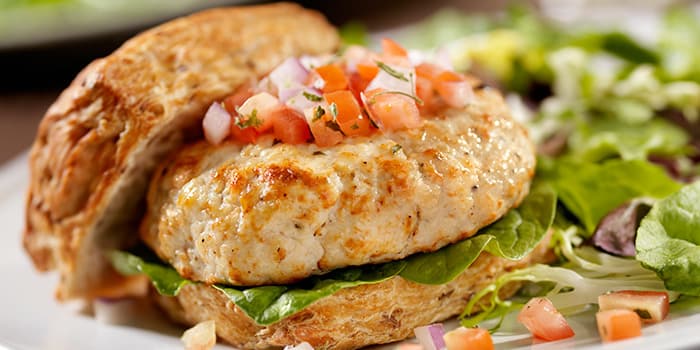
Turkey Burgers
Make tonight burger night with these flavorful turkey burgers seasoned with fresh herbs. We topped ours with fresh salsa, a healthy, low-calorie condiment.
Total Time: 32 min.
Prep Time: 10 min.
Cooking Time: 12 min.
Yield: 4 servings
Ingredients:
¼ cup whole wheat bread crumbs
½ cup low-fat buttermilk
1 lb. raw 93% lean ground turkey breast
2 green onions, finely chopped
2 Tbsp. finely chopped parsley
1 tsp. Dijon mustard
1 dash Worcestershire sauce
Ground black pepper (to taste; optional)
Preparation:
1. Combine bread crumbs and buttermilk in a medium bowl; mix well. Let sit for 10 minutes.
2. Preheat grill or broiler on high.
3. Add turkey, green onions, parsley, mustard, Worcestershire sauce, and pepper (if desired) to bread crumb mixture; mix well with clean hands.
4. Shape into 4 patties.
5. Grill or broil for 5 to 6 minutes on each side, or until patties are no longer pink in the middle.
By: Beachbody
Containers Equivalent: 1 Red
Wednesday, August 17, 2016
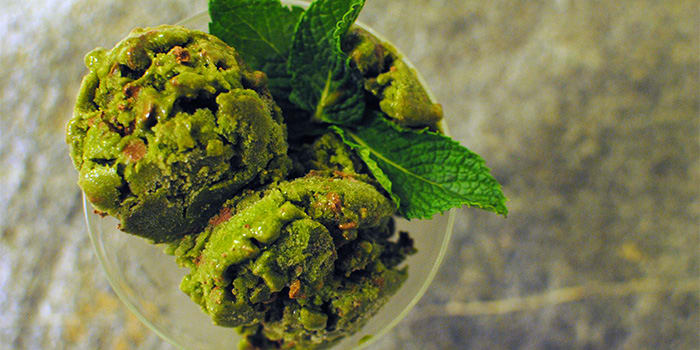
Mint Chocolate Chip Ice Cream
Mint chocolate chip ice cream gets a #21DayFixApproved makeover that would make Popeye proud. Made with whole fruit, coconut milk, and mini chocolate chips, it gets it’s vibrant hue from a secret ingredient.
Total Time: 5 hrs. 10 min.
Prep Time: 10 min.
Cooking Time: None
Yield: 2 servings
Ingredients:
1 medium banana, cut into chunks
¼ cup canned lite coconut milk
¾ cup fresh spinach
½ tsp. pure vanilla extract
⅛ tsp. pure peppermint extract
¼ cup mini chocolate chips
Preparation:
1. Place banana in plastic bag; freeze for 4 hours, or until completely frozen.
2. Place coconut milk and spinach in blender (or food processor); cover. Blend until smooth.
3. Add frozen banana and extracts. Blend until smooth.
4. Add chocolate chips; mix well with a spoon or rubber spatula.
5. Pour into a freezer-safe container; freeze until set.
By: Beachbody
Container Equivalents: 1 Green, 1 Yellow, 1 Purple
Tuesday, August 16, 2016
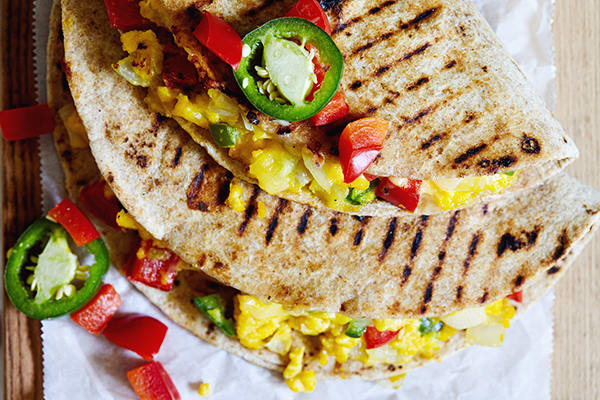
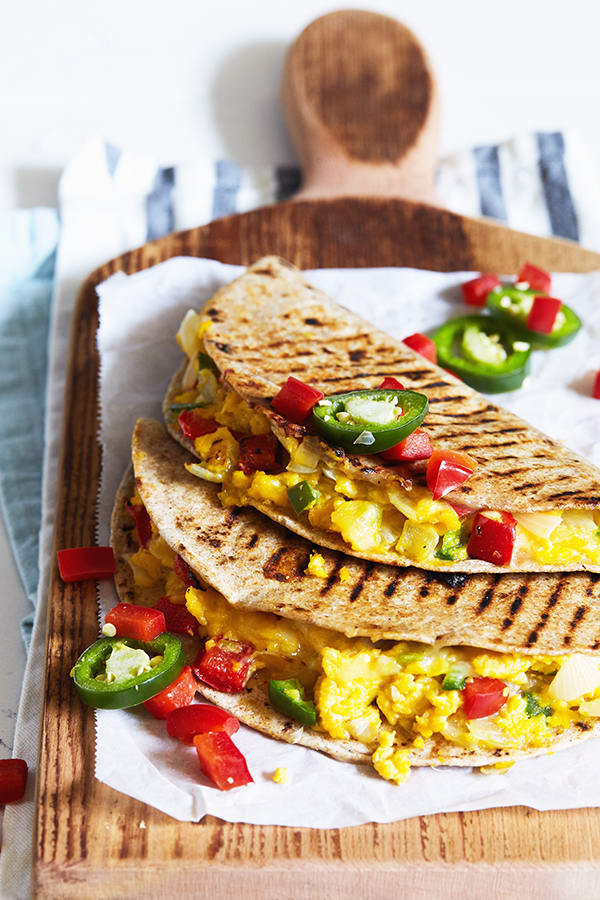
Breakfast Quesadillas
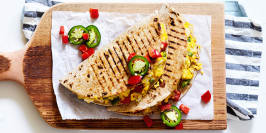
Breakfast is such an important meal of the day, but so often it’s the hardest one to “do right.” Weekday mornings can be especially tough. Somehow, in between my alarm going off and needing to jet out the front door to work, breakfast is supposed to squeeze its way in. And I don’t know about you, but that doesn’t usually leave much time for cooking!
These Breakfast Quesadillas are absolute life savers in the morning. It literally takes seconds to grab one out of the fridge and heat it. Talk about instant breakfast. It’s even more convenient than stopping at a café or drive-thru on the way to work. And the flavor… I mean, who can resist colorful veggies, protein-packed eggs, and melted cheddar cheese?! It’s basically a grilled cheese with boosts of protein and a little fiber. Even picky kids can get on board with this.
It’s quite easy to whip up these quesadillas, and, if you’re a fan of meal prep, making several of these in advance will save you tons of time during the week. You can make up a batch on the weekend (or weeknight), and then refrigerate extras to eat during the week.
Start by sautéing the fresh veggies, and then add in the eggs and cook until set. This recipe calls for a mix of whole eggs and egg whites, which delivers all the taste and protein, but slightly cuts down on the cholesterol, fat, and calories. The delicious mixture is then tucked into whole-wheat tortillas and topped with cheese. Another visit to the pan helps to crisp up the outer edges of the tortilla and melt the cheesy deliciousness inside.
Breakfast Quesadillas
Prep time
15 mins
Cook time
15 mins
Total time
30 mins
Author: Beachbody
Recipe type: Breakfast
Serves: 4 servings, 1 quesadilla each
Ingredients:
2 tsp. olive oil
1 medium onion, chopped
1 medium red (or orange) bell pepper, chopped
2 medium jalapeños, seeds and veins removed, finely chopped (optional)
3 large eggs, lightly beaten
4 large egg whites (½ cup)
4 (8-inch) whole wheat tortillas
½ cup shredded cheddar cheese
Instructions:
- Heat oil in medium non-stick skillet over medium-high heat.
- Add onion, bell pepper, and jalapeños (if desired); cook, stirring frequently, for 4 to 5 minutes, or until onion is translucent. Reduce heat to medium-low.
- Add eggs and egg whites; cook, stirring frequently, for 4 to 5 minutes, or until eggs are set. Remove from heat.
- Top each tortilla evenly with egg mixture and cheese.
- Fold each tortilla in half; cook in medium nonstick skillet over medium-high heat, for 4 to 5 minutes, turning once, until cheese is melted and tortilla is golden brown.
- Tip: You can cook quesadillas you are going to eat or serve, and you can tightly wrap the others and refrigerate for 3 to 4 days (or freeze them). This is a great way to have breakfasts prepared in advance.
Container Equivalent: 1 1/2 Yellow, 1/2 Green, 1/2 Red, 1/2 Blue, 1/2 tsp.
Monday, August 15, 2016
5 Yoga Moves for Core Strength
You don’t need to perform endless crunches to build a strong, sexy core. Don’t believe us? Add this yoga routine to your fitness plan to see for yourself. When performed correctly, yoga can be a powerful core builder, forcing muscles throughout your body—especially in your torso—to work overtime to keep you balanced and stable as you build mobility and increase range of motion. And by holding each pose, you’ll extend the time your muscles are under tension, which is the key to building serious strength. In a few weeks, go ahead and take a good long look at your profile in the mirror—we’re willing to bet you’ll see a slimmer, stronger version of yourself staring back.
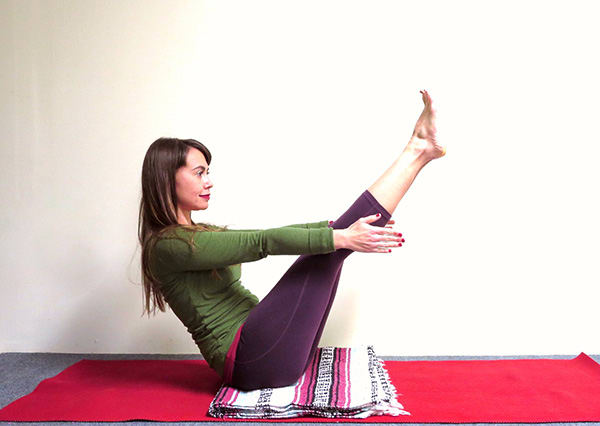
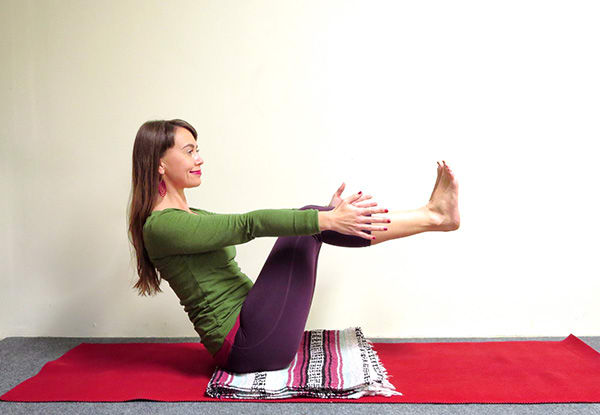
Boat Pose- Navasana
There are two versions of this pose, both of which will test the strength and stamina of every muscle between your hips and shoulders. Version 1: Plant your sits bones (the bones directly under the flesh of your butt) firmly on the floor, bend your knees, and place your feet flat on the ground. Sit up straight (your chest should remain higher than your knees) and brace your core as you lift you feet off the ground. Keep your knees bent as you raise your lower legs until your calves are parallel to the floor. Hold for 8 to 10 breaths.
Version 2: Instead of keeping your calves parallel to the floor, straighten your legs so that your body forms a “V”
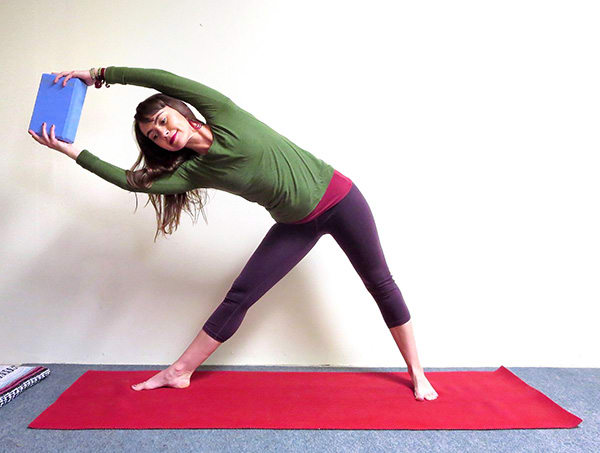
Triangle Pose- Utthita Trikonasana
This pose is taught in almost every yoga class, and with good reason: It engages nearly every part of the body, strengthening your core, opening your hips and shoulders, and stretches your legs. Spread your feet 3 to 4 feet apart, aligning your left foot with the back edge of your mat and positioning your right foot so that your toes point toward the front edge of your mat. Extend your arms straight above your head (if you like, you can hold onto a foam block to help keep them aligned). Keeping your torso straight, hinge right as far as you comfortably can. Hold for 8 to 10 breaths. Raise your torso back up, switch foot positions, and repeat to your other side.
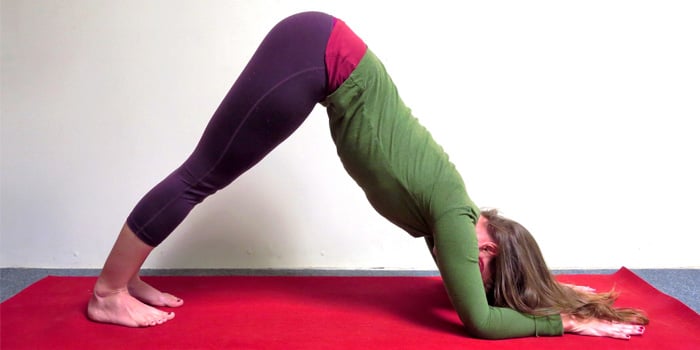
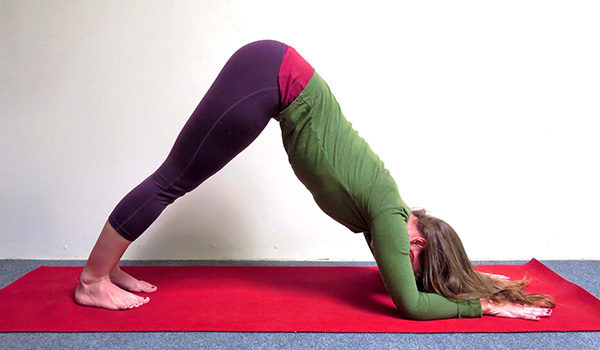
Dolphin Pose- Makarasana
This pose bears little resemblance to anything a dolphin might do, but it will strengthen your core, arms, and legs, and elicit a deep stretch in your calves and hamstrings. Begin in a push up position with your weight resting on your forearms instead of your hands. Your shoulders should be directly above your elbows, and your palms should be flat on the ground. Take a deep breath, and then exhale, lifting your hips and lowering your heels to the floor as you press back into a modified downward facing dog position. Hold for 8 to 10 breaths, and then drop your knees and press your butt onto your heals, reaching your arms forward. Hold this “child’s pose” for several breaths.
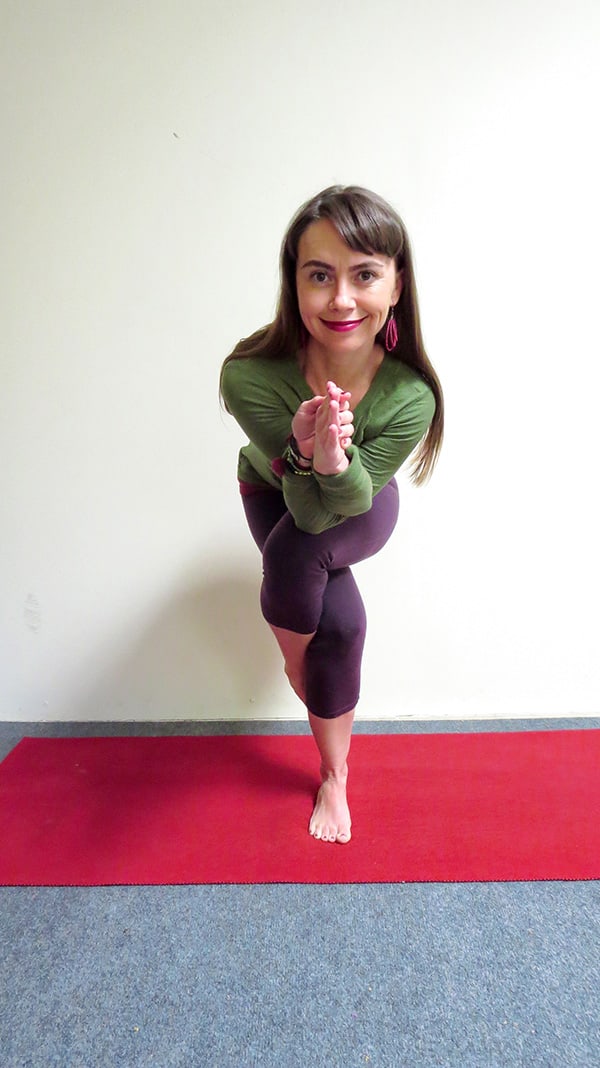
Eagle Pose- Garudasana
Eagle pose requires focus, strength, and flexibility, and will strengthen your legs, glutes, core, and back. It will also stretch your shoulders, hips, thighs, and back. Stand tall and focus on a point on the floor about 3-feet in front of you. Extend your arms straight out in front of your chest, and then “entwine” your arms, wrapping your left arm around your right, and gripping either your right hand or right forearm with your left hand. Bend your elbows until your forearms are parallel to the floor. If you’re new to this pose, bend your knees and place your leg on top of your right, so that your feet and knees are “stacked.” If you’re able to perform this version of the move with perfect form, make it harder by crossing your left leg over your right leg, and wrapping your left foot behind your right calve. (You can also touch your elbows to your knees for an even greater challenge.) Hold for 5 to 10 breaths, switch sides, and repeat.
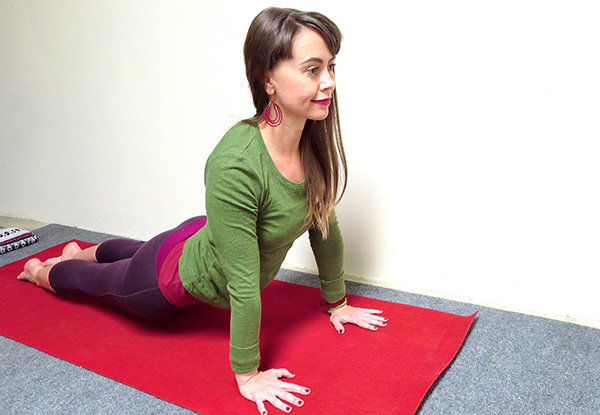
Upward Facing Dog- Urdhva Mukha Svanasana
This pose might look simple—and compared to the eagle pose it is—but its benefits are powerful. Performed regularly, it will help open your chest and upper back, improve your posture, strengthen your spine, wrists, and arms, and stretch out your abs, making it the perfect pose to cap off this yoga workout. Start by laying on your stomach with your chin resting on the ground. Your ankles should be flexed (the tops of your feet should rest on the floor), and your legs should be extended behind you. Place your hands under your shoulders, palms on the floor. Press up, straightening your arms as you lift your knees, thighs, pelvis, stomach, chest, and head off the ground. Hold for 8 to 10 breaths.
By: Beachbody
Tropical Fruit Salad with Vanilla Yogurt
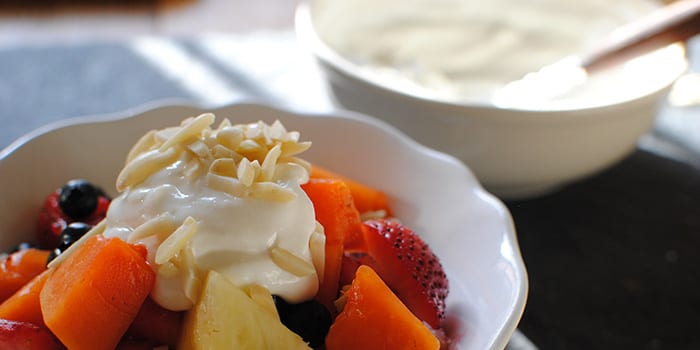
This tropical fruit salad topped with vanilla yogurt sauce and crunchy almonds is great for a colorful breakfast or snack. Or, consider bringing to your next barbecue so you’ll know there is something healthy and delicious to put on your plate!
Total Time: 15 min.
Prep Time: 15 min.
Cooking Time: None
Yield: 14 servings (½ cup fruit salad, and about 2 Tbsp. yogurt sauce)
Ingredients:
2 cups nonfat plain yogurt
1 Tbsp. raw honey
½ tsp. pure vanilla extract
1 medium pineapple
1 medium papaya, peeled, cut into 1-inch cubes
1 cup fresh blueberries
1 cup quartered strawberries
¼ cup slivered raw almonds (1 oz.)
Preparation:
1. Combine yogurt, honey, and extract in a medium bowl; mix well. Refrigerate, covered, until time to serve.
2. Stand pineapple upright; vertically cut about a third from one side, leaving the leaves attached. Remove fruit from large half, leaving a ½-inch thick shell. Discard outer peel from the smaller section. Cut fruit into ½–inch cubes.
3. Combine pineapple, papaya, blueberries, and strawberries in a medium bowl; toss gently to blend.
4. Serve fruit salad evenly topped with yogurt sauce and almonds.
By: Beachbody
Container Equivalents: 1 Purple
Saturday, August 13, 2016
Multi-Grain Banana Pancakes
Make your weekend breakfast something special! These hearty pancakes are made with wholesome ingredients and are naturally sweetened with bananas and a touch of honey. They’re a good source of dietary fiber and have 10 grams of protein per serving. And, they freeze well. Layer leftover pancakes with wax paper and freeze. Reheat in a toaster or oven.
Total Time: 20 min.
Prep Time: 10 min.
Cooking Time: 10 min.
Yield: 4 servings, 2 pancakes each
Ingredients:
1 large egg, lightly beaten
1 Tbsp. coconut oil, melted
1 cup low-fat milk
¼ cup nonfat plain yogurt
1 very ripe medium banana, mashed
1 Tbsp. raw honey
½ cup whole wheat flour
½ cup all-purpose flour
¼ cup old-fashioned rolled oats
3 Tbsp. wheat bran
2 Tbsp. chopped raw almonds
1½ tsp. baking soda
½ tsp. sea salt
Nonstick cooking spray
4 tsp. pure maple syrup
Preparation:
1. Combine egg, oil, milk, yogurt, banana, and honey in a medium bowl; whisk to blend. Set aside.
2. Combine flours, oats, bran, almonds, baking soda, and salt in a medium bowl; mix well.
3. Add flour mixture to egg mixture; mix until just blended.
4. Heat large nonstick skillet, lightly coated with spray, on medium-high heat.
5. Spoon about ¼ cup batter into skillet for each pancake; cook for 1 to 2 minutes or until bubbles form on top.
6. Flip with spatula and cook for 30 seconds.
7. Repeat with remaining batter.
8. Serve pancakes topped evenly with maple syrup.
By: Beachbody
Container Equivalents: 2 Yellow, 1/2 Red
Friday, August 12, 2016
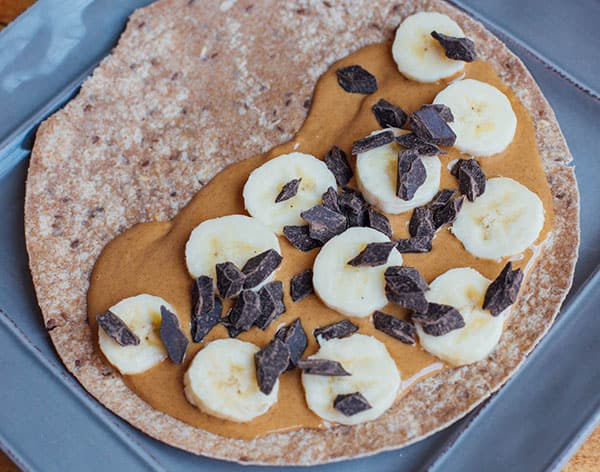
Chocolate, Peanut Butter, and Banana Sweet Quesadilla
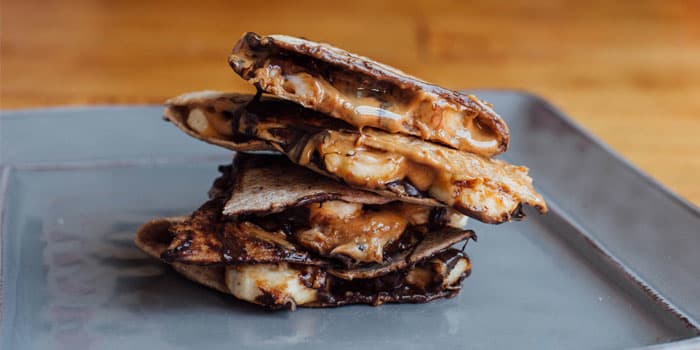
Chocolate, peanut butter, and bananas are all delicious on their own, but put them together and you have an incredibly scrumptious treat that will make you swoon. This sweet quesadilla tastes like it should be off-limits in any healthy diet, but every once in a while you can “cheat clean” with one of these. For something so decadent, it has only 300 calories, and provides 7 grams of protein and 3 grams of fiber.
Chocolate, Peanut Butter, and Banana Quesadilla
Total Time: 15 min.
Prep Time: 10 min.
Cooking Time: 5 min.
Yield: 1 serving
Ingredients:
1 (6-inch) whole wheat tortilla
1 Tbsp. all-natural smooth peanut butter
½ large banana, thinly sliced
1 Tbsp. dark chocolate (or semi-sweet) morsels
Preparation:
1. Spread half of tortilla with peanut butter.
2. Top peanut butter with banana and chocolate morsels. Fold tortilla in half; cook in medium nonstick skillet over medium-high heat, for 4 to 5 minutes, turning once, until chocolate is melted and tortilla is golden brown.
By: Beachbody
Container Equivalents: 1 1/2 Yellow, 1 Purple, 3 tsps.
Thursday, August 11, 2016
4 Things You Should Do for an Effective Rest Day
We spend a lot of time encouraging you to work up a sweat to help you get — and stay — fit. So if we’re recommending you take a day to do pretty much nothing, well, there’s probably a good reason.
Rest days are crucial not just for giving your body time to recover from workouts, but also to help your muscles become stronger and bigger as they rebuild. (Before we start, make sure you’re well-versed in the difference between rest days and recovery days.)
You hear elite athletes talk about taking rest days and recovery days, but a rest day is important even if you don’t consider yourself an athlete. So if you just started the 21 Day Fix and are new to the stimuli and physical stress of working out, or if you’ve been working to your maximum capacity with INSANITY MAX:30 every day, you want to make sure to give your body a break from time to time.
“Heavy exercise designed to elicit maximum gains in strength and power damage muscle to an extent,” explains Elaine Choung-Hee Lee, Ph.D., associate director of the Human Performance Laboratory at the University of Connecticut. “Day after day with little time between heavy training sessions, muscle may not have time to fully recover, and you’ll actually see a decrease in strength, power, and endurance.”
On The Cellular Level
Working out causes microscopic tears in muscle tissue. As your body repairs the damage, it remodels your muscles into larger, stronger versions of themselves so that they’re better able to handle the stresses and strains of working out next time. This process also entails a certain amount of inflammation, which can take up to three days to resolve, says Lee.
In addition to the physical effects, intense workouts can also tax the nervous system, says Mike Bracko, C.S.C.S., exercise physiologist and fellow in the American College of Sports Medicine (ACSM). “On a recovery day, the sympathetic nervous system (the ‘fight-or-flight’ response) is decreased and the parasympathetic (calming) nervous system is stimulated. This allows the body to rest and relax, cortisol levels to decrease, muscles to rest and rebuild stronger, and carbohydrate stores to be replenished,” Bracko explains.
You should take at least one day off per week, though the ACSM recommends beginners give themselves a rest day in between workouts. Additionally, if you’re completely gassed from training hard, take that as a cue to take a full day off and not exert effort to do much of anything, Bracko says.
OK, so now that you understand why it’s okay to give yourself a day off, what is the best way to take a rest day? We’ve outlined it below.
4 Things You Should Do for An Effective Rest Day
Sleep In
“Sleeping is hands down the most important part of any fitness program,” Bracko says. Scoring quality shut eye both when training and resting is crucial. The whole point of a rest day is you’re giving your body the opportunity to recuperate, and nothing helps decrease the strain on your systems like loading up on sleep. Shoot for at least eight hours.
Eat the Rainbow
A rest day means you’re giving yourself a day off from training — not a day off from your diet. It’s always important to ensure you’re getting enough macronutrients (carbohydrates, fats, and proteins). But the other nutrients that fresh food offers are important too as Lee says those training days tap into your key nutrient stores. “Antioxidant-rich, micronutrient-rich, and vitamin-rich foods are especially important to recovering muscle tissue,” says Lee. So put down those fries.
Instead, eat fruits and vegetables in a rainbow of colors — the hues are often evidence of a specific micronutrient, so you want to eat as many as possible — as well as healthy fats, like avocado, olive oil, salmon, or a supplement like omega-3 fatty acids, all of which can help combat inflammation.
Don’t Skimp on Protein
You’ve probably heard it’s important to consume protein within 30 minutes after a grueling workout, but studies show that your body’s ability to utilize protein to build muscle remains elevated for a full 24 hours after your sweat session. Your day off is likely still within that post-workout 24-hour window, so your body is still working to rebuild torn muscle tissue even if you aren’t causing any new damage that day. To do this, your body needs a fully-stocked amino acid pool from proteins — so eat up that protein!
Powders like Beachbody Performance Recover post workout formula will deliver 20 grams of protein along with nutrients like pomegranate extract to help promote muscle recovery and reduce muscle soreness.
Think of it this way: Downing sufficient protein every day gives your muscles the best chance to rebuild as strong as they possibly can after a single workout. What better argument is there?
Hydrate
“Drinking water to maintain a hydrated state during training, after exercise, and during recovery is critical to not only performance but also to reducing fatigue, improving your mood, and improving cognitive function,” Lee explains. When you’re properly hydrated, your body is functioning as optimally as possible.
How much water should you guzzle? “Drink so that when you pee, your urine is the color of light lemonade,” Lee offers.
Rest Day vs. Recovery Day
If you’re feeling completely wiped from a tough workout, don’t hesitate to kick your heels up and give yourself a day of complete rest. “Fully passive rest days are important for replenishing nutrient stores,” Lee says.
But if you’re feeling good, or just a little sore, consider performing “recovery activities” like walking, easy cycling, swimming, or yoga, along with foam rolling the muscles, all of which which will boost blood flow to your muscles, enhancing the delivery nutrients that facilitate their repair and growth, and eliminating substances that hinder them.
By: Beachbody